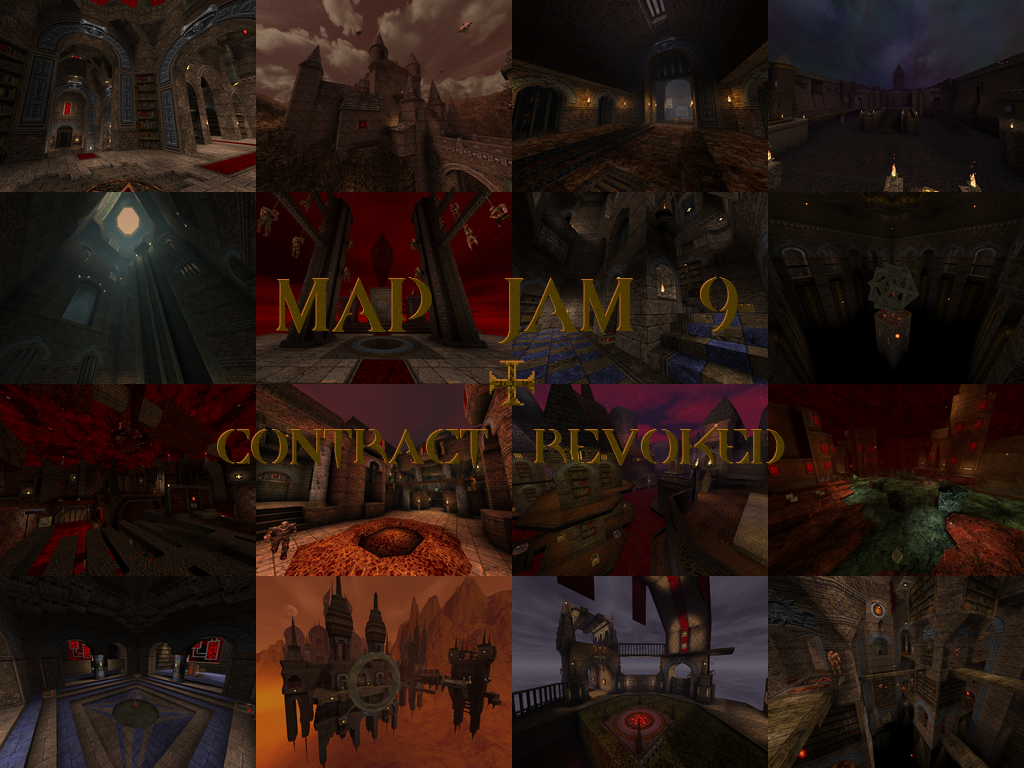
|
I saw the barred off doors at the end and assumed you wanted to expand the map more in those directions but had no time.
Feel more like trying to do something completely new with what I've learned. In this case, yeah, this is probably a better idea. Barred doors at the end are just supposed to give you an idea that this place is much bigger than it actually is. Something that I've picked from all the articles about level design lol. Not sure if its working actually, but feels better than just walls.
As you may have seen in my demo I missed the first secret and it was driving me crazy. I also was not sure how to get to the Quad. Watching OTP's demo I was so pissed off at myself!! As far as playtesting it's a must and I'd be happy to discretely playtest your next map, just reach out. My oldest son plays Quake quite a bit but I hate watching him test my maps because he's always in a rush. Misses obvious things, bunny hops all over the place and just plays to kill monsters. My youngest isn't as into Quake as I am so he kind of derps along also missing things etc.
The disparity in skill levels here on func is pretty vast. I never play on hard as I am not that good. But take a look at other levels and other demos as you will learn a lot about how people play. Ionous and Arrrcee really conserve ammo and health when they play. Other players play very slowly and methodically looking for every secret. It's fascinating and frustrating to try and guide the player. Anyway, I really liked your map and I agree with the others - unless something is broken badly, move on to your next project. DBear, 2/3 of your secrets confused me. I figured the first room contained a secret since there were zombies behind bars that you can't kill without a GL. But where's the GL? You don't get one until the final arena. And to go back, you MUST take fall as you drop down the elevator shaft. And unless I missed something (which is totally possible), the 3rd secret requires you to take a substantial amount of damage as well, since you must rocket jump to it. Was this intended? Secrets should never require the player to take damage. What if they're too low health to attempt it?
Enjoyed your map. Yours are always a a highlight although I had some trouble finding the secrets on this one. Here are my demos I omitted the last one of me searching for secrets. Lots of derping and well... you know where they are. I only found 4/6 and ran out of ammo so I figured that was it. no_clipped with r_fullbright 1 and still could not find them!!!!! (well their triggers anyway.)
Very cool vertical feeling we all love from your work. I will play it again and hopefully get all secrets. Please list a good demo from another player here (by post number if possible) I'd like to get some highlights for a promotional video for jam9. I will record the demos and cut a shot trailer that features some good moments from as many maps as possible. The more I play this the more impressed I am. I'd like to get the word out so more people play this fucker.
Mugwump I'd love to use your track if possible for the music. Great. Will start collecting footage and cut something very cool. Hoping map authors will share their favorite demos so I can get some great clips to cut to.
Thanks for the kind words. The secrets are a bit hard; I'm far more adept at making secrets than finding them.
thanks, I'll keep you in mind when its time for my next project :) Being newcomer here, I'm kind of shy to ask people who never heard of me before, to do stuff for me. Actually I'm always like that :) But now that you mentioned it, I might take you up on your offer :D
@sevin Third secret is poorly made on my side, but it doesn't require rocket jump to access it. Just careful observation, although I admit it could have been made more obvious. There is no way you can spot it during the final battle, and after that you won't need quad damage anymore. I'll try to do better next time :) I can't remember exactly, did someone here post a custom knave.wad with some modified textures or something? I can't seem to find the post, wondering if it was a different thread or if I'm thinking of something completely different and just getting confused.
I posted an edited version of the jam wad here with the fullbright pixels fixed:
http://celephais.net/board/view_thread.php?id=61461&start=237&end=237 http://www.quaketastic.com/files/demos/otp9_breezeep.zip
Sorry you had to wait so long for this demo. :P Anyway, this map is outstanding! Easily in the top 3 maps from this jam so far. I can hardly believe you didn't spend the entire 6 week timeframe on it. This could have easily been a standalone release with 5 stars on Quaddicted, that's how polished it is. As usual with a Breezeep map it wears its influences on a sleeve. My favorite areas were the ones that appeared original, though, as in the SK dungeon (and how it intertwined with the start, such a cool moment) and the tall library above it, I very much loved the breaking of symmetry in the latter. Some of the most difficult secrets in the jam so far too. I finished with 4/7 and only found 2 more (Cross and rocket ammo) way later. If anything, the HPL secret was possibly the easiest secret of them all - I don't mind making some secrets easy if I'm very happy with how the areas turned out (and your HPL secret was AMAZING to look at), so that more people can enjoy seeing them, but this was a bit funny. Again, pretty challenging on skill 2 but the difficulty spikes weren't as sharp as in the retro6 map. There was a surprising lack of Shamblers through the entire thing... Overall a great map, one of the best in the pack. Time for a standalone release now! https://www.youtube.com/watch?v=G5gdioIQrNQ
I also posted this on Quaddicted, so I figured I'd post it here for the authors like last time. Part 2 houses the next 5 maps in alphabetical order. All ten maps I've played so far have been super high quality, again, still not a bad map in the bunch! Haunter's Map: First off, welcome to the community (if you are indeed new?) and I really liked your map! I have a very special place in my heart for short maps and your map here is short but it not only offers up a good amount of variety in the gameplay and combat but it also just looks beautiful! If I had to nit pick anything, it might be that the first room with the 2 buttons is a little uneventful but not a big issue really. Absolutely love that last area with the 2 Vores. Based on the presentation alone, the stone tablet, the broken stone floors, the spinning monolith and all the dead bodies... This one room tells such a frightening story and it rocks! Really looking forward to seeing your next release! Ionous's Map: I'm going to echo a few of the same sentiments I had for Haunter's map, which is that it's also awesome to have a short map and it's really well crafted! The flow of this map was great! It felt very organic and natural the way the enemies were spawned in and introduced. I also really liked the idea that this castle was on top of or surrounded by lava and I would've loved to see a bit more of that used in the map. Really not sure how to get to any of those secret areas I saw. I was able to get to one, but I had no clue about the others. Awesome job on this one Ionous! Kell's Map: I really enjoyed this one as it was so different from the rest! I wasn't expecting a map with low gravity and I really wasn't expecting a void map at all from the man who brought us the original episode! This one did well to stand out from the other maps so far and it's actually really good too! Good flow, lots of fun jumping form platform to platform. The custom pieces made for this map rock. The prisoner in the weird floating contraption... I had a hard time not looking at it when I walked passed it. I will also echo what most others have already said and that is that the stargate in the middle of the map is amazing looking! The way it's introduced is even better though. You jump to the first floating dock and turn to your left to see some pointy spikes and you wonder what the hell it might be. Then once you get in front of it, you see it in all of its glory and it's stupendous! This map feels like the beginning of a brand new episode or the end of one. Like the Quake guy has defeated a demon in a castle and created a rift in time, revealing the stargate and ripping the castle apart. You jump from platform to platform, castle brick to castle brick to reach the stargate, but where does the Stargate lead? I love how some of these maps suggest stories like that and yours really allows for some of that creativity. Great job on the map and thanks for Contract Revoked! Mukor's Map: This map was very interesting in its approach. The first half of it is a normal Quake map, with several rooms and enemies leading to the silver key. I actually really enjoyed the pacing of this part. Then the last half you're thrown into a wave-based/horde fight and this fight is tough! I was able to cheese the boss monsters to take them out at each interval, but had I not been able to do that, I'm not sure that I would have finished it. I love the skybox used on this one too, but there are very few times you actually get to see it. All around, great map, love the atmosphere and pacing of the first part of it but that last fight was pretty damn challenging, you sadistic man you! =P Great job nonetheless, there were some great moments in this playthrough! Nailelveni's Map: Nait, I've played through a few of your maps for jams over the time I've been doing the show and I have to say that I think you really out did yourself with this map! You've never made a bad map in the past but this one, I feel, puts you into a new bracket of talent. This map starts off in a base, a very Quake 2 feeling base... I wasn't expecting that at all! Then while I'm thinking, is this just a base map? You have the player walk through a portal into the hell of the Contract series. Nicely done introduction! The rest of the map is really well done as well, as it flows you through MANY different areas. You go through courtyards, castle halls, the underground, the moated area, the library which all leads you to this immense horde fight at the end! It's all very well paced, well put together and an all around great map! Excellent job on this one Nait! The final part coming soon! If you'd like any clips for your trailer from my playthroughs, let me know. No demos for them but they're recorded in 1080p.
Been trying not to read the thread until I finished the pack, but I have to say it's a really fantastic job everyone's done here. I've got some demos and some short round-ups on each map coming up now. I played through on nightmare of course...which did mean I died on the first playthrough quite often. So what I've tried to do is include my first attempt, plus a demo where I got to the end of the map.
Kell: loved it, the teleporter gate made a fantastic centrepiece, and the changing gravities is something I don't remember seeing in a map like this. On a technical note, did you try using a big trigger_gravity first? It might have been an easier way to preserve gravity in save games. Managed to get through in a single sitting (thanks for not making the void a death). A real scavenger-style gameplay, making do with limited resources throughout the combat. I didn't make good use of the power-ups, but found more secrets than my average. demo Mukor: another great map, really dig all the pillars(also featuring in future maps) and the consistent style. I love how a little bit of compiler tech like phong shading breathes new life into the old engine! I liked how in the final arena, despite how large and complex it was, Vermis was always present as a threat (which killed me after I got stuck on a knight in demo 1). Cleared on the 2nd attempt. demo Naitelveni: although I was slightly thrown by spawning in a base, once the level proper got going it was another fantastic Knave map, especially liked the curved architecture and rockys parts. My first attempt ended when I fell into the void near the vores. Attempt 2 died when I got trapped in the slime before the library and got pelted by fireballs at the same time, and attempt 3 ended in the final arena, so I included attempt 4 where I used the quad better and survived. demo G1ftmacher: a really great sense of place in this map, from way the tight dark maintainence shafts corresponded to the actual lift mechanism, to the light airy gardens where some refined villian could pass an afternoon pleasantly. Reminded me of Bioshock Infinite a bit! My first attempt died trying to make a risky jump to a secret, but thankfully I saved before attempting it. The double shambler ambush was too much to survive unwarned in attempt 2, and attempt 3 by the overly deadly abmush in the double secret, so attempt 4 is included (I defeat the final gug, then go secret hunting and die again to the double secret - I conquered it off-camera I swear) demo Ionous: A distinctive map in gloomy grey with nice angles and verticality. Combat was tense throughout, as the monsters used the loops in the layout to great effect by repeatedly flanking me. At the very end I was out of health packs and inches from death, with a Drole raining fire from above me, and a Voreling whose life I spared earlier starts nipping my ankles from behind. I'll leave the demo to tell how that one ended... I know I missed a lot of secrets here, and felt like there was more left to explore, a map to revisit now.
demo Skacky: a huge, epic map, I'm amazed you could do this and the start map as well! Loved the skyline. The eerie atmosphere of the creaking platforms between shelves stretching into the darkness was great (and getting the lighting to fade to black like that is not as easy as it looks). The RL area was also a really effective multi-level combat space, fighting monsters from all angles. The two major arena combats were very enjoyable fights, although sadly the final one was a bit too hard for me to survive first time. Sadly I didn't record the second time through, but I cracked it in the end through slightly more cowardly play. demo Haunter: a neat, small scale map with some lovely detail in the two main arenas. The death brigade chipped me too much in the first playthrough to survive the Drole, so I gave no ground second time and made it through. Would have loved to see more! Didn't have any luck on the secrets, but I never do... demo ShoTro: An enormously creative level, taking full advantage of the idea of multiple revisits to the same space. I liked the sense of progression, on the first time through, fighting the Nail Ogre and the Death Guard on the way to The Gallows is a test which can cost you dear in HP. By the 3rd time it's a breeze that you swing through any time you want to stock up on free rockets and nails! 0 runes: This took by far the most attempts, and might have soured me on the whole map if I hadn't revisited so much afterwards. I don't know if it's just because skill 3 Chthon leads shots better, but his arena killed me. After about 20 attempts I came up with the strat in the final demo to skip half a round of fighting, but this still took another 15 tries to record. And of course I get glitched into the lava immediately after surviving... 1 rune: the library was my favourite bit of all the runes, and I found it neat that later on you had the idea to remove the books from the shelves, to explain why that part stopped working! 2 runes: another cool change to the map to create shortcuts and new paths. I died to the edie rush first time, barely survived second go. 3 runes: took me ages to discover the new gold key location, the whole new tower on the map was really cool. I mistook an outcrop of rock below the tower for a secret, and willingly jumped to my death. Shub lair was a really cool texture theme and design, took me a while both to crack the gimmick, and then find all the sigils. Definitely some hair-raising combat moments, but the respawning items kept it fair. 4 runes: the combat in the underground was tougher than Vermis, I guess having the run of the map made it easier to pick a fight with the latter. The demo is a second try as I died to an Edie first time. The specimin tanks were really cool down there! demo Pulsar: surely the most spectacular opening shot of any map in the pack, and the rest of the map lived up to the design as well. Some tense moments in the combat, getting sniped while precarious about the viod, or trapped in a tight space with a shambler, but they were always fairly constructed. Some nice puzzles too, although I spent too long trying to get the SNG and still failed (ending attempt 1 with death). Attempt 2 got as far as the last two Gugs, but I died - I recorded the 3rd attempt but I think it's more interesting seeing the demo where I saw the 2nd half of the map for the first time so I included that instead.
demo onetruepurple: Another wonderful looking map, I really liked the contrast between the opulent library above and the decrepit sewer below. I also really appreciated the way that although on the surface the sewer had a lot of symmetry, there was lots done to break that symmetry up, or in the case of the spikeshooters at the far end, have the two halves interact so they felt like more than just mirror images. Combat was varied and never unfair, although in the early stages I near came unstuck, and the final combat made a pair of fiends a threat. Also must know how you did those weird shimmering colour effects on the books at the start, that was so cool! demo dumptruck_ds: There's a really grandious scale to this map, in my mind somewhere between Doom and Quake, especially with that wonderfully hellish secret lurking under the first room. Some very unique combats in this one as well, like hiding from a Shambler whilst fighting off endless hordes of Vorelings. The final combat has a kind of tribute to e4m2 in it, except the water ceiling becomes a usable feature in the combat. I don't quite make it in the first play-through, getting trapped between a Shambler and a ladder. I prepare much harder for the second attempt, which goes much better as you can see! demo Bloughsburgh: A design like no other in the pack, sort-of where chapters and zerstorer would meet (or should that be meat?). The spinning blades with sprays of gibs are really well made, and I liked the intricate cages made using fence textures, which also allowed for interesting exploration and secrets. Combat here was REALLY hard, I've got 7 demos recorded and must have made a half-dozen other attempts wich I didn't save. Attempt 5 got me as far as the silver key, and things got better from there, I think it's hard to keep up with nightmare rates of fire from the water. Missed most of the secrets in this playthrough, which was a shame as the map has lots of cool ones. I've gone back and defeated the Death Lords since, although I needed the walkthrough to get the waterfall one! demo NewHouse: Another map that carves out its own style, asking what a Contract Revoked map turns into once the Base monsters take over. There's an atmospheric, almost horror-movie moment where the player is in a pitch black room, then a stray gunshot happens to light the room, revealing all the corpses hanging from the ceiling...Combat was firmly set in the "romp" mode, where if you have fewer than two power-ups on the go at a time you're doing it wrong. However, there's no armour in the map making the player a glass cannon. This makes nightmare especially hard, because the monsters aren't any harder to kill, they just do more damage. So this took more than a dozen attempts (some unrecorded). I think when I beat the map it was only my second time past the silver key door though, so the back half of the map is easier to survive. demo DelusionalBear: a solidly built map with a really nice central atrium - I thought it was a shame that we never got to revisit it through the upper levels where the Ogres and Death Knights were sniping from. The warm lighting/cold fog colour scheme really worked well, especially around the lift area. Combatwise everything was fair - I didn't pay enough heed to a shambler and got killed in my first attempt, and I spend a long time in the demo failing to set up a big infight with the Scrags (they just wipe themselves out with friendly fire). I got two of the secrets, although because I missed the GL in my playthrough, I couldn't see how you'd manage to get the armour secret until you'd beaten the map, so it seemed strange at the time. demo Yup, still going, that's how huge this pack was!
Breezeep: exquisitely designed map, just wonderful. The inside and out were built with the same precision, down to the little things like the trees on the clifftops in the distance to give a sense of scale. The combat was also really well paced, giving the player the upper hand on unsuspecting monsters at the start, then gradually building up more dangerous scenarios, all the way to the top of the library, which was really hard to safely unpick because the monsters covered each other so well! I had several close calls during the map, then managed to drop the ball on the very last combat. I was fixated on the Gug and didn't acknowledge the Droles, causing me to break the infighting up without thinking. demo Secret: Wow Skacky, really working overtime here! Another great map, this one with a big vertical presence looming over you from the start. Some fun combat on the way (I enjoyed playing matador to get fiends to leap void-wards) but it's all about the final arena. Given the sheer volume of monsters (and the way they spawn a few at a time rather than all at once) it's amazing that it works as well as it does. I just about kept up until the Gugs came out, then I got wiped out pretty quickly. Second play through I took much better advantage of the secrets, got to the final arena faster and with more HP...and still died the same way. Luckily I saved a few seconds from death, and from that save finally defeated the Gug horde. demo Wow, that was amazing. I have to say thanks again for this huge, amazing pack. And sorry for the confusion over Quoth 2.2b, in future if I ever fix a crashing bug I will always make sure to bump the version number. While playing through, I was also testing the new "pak file" version ready for posting on https://tomeofpreach.wordpress.com/quoth/map-packs/ I had to make some ever so slight modifications to the maps to make the pak file work (renaming the start map to "jam9", tweaking the exit triggers to point at jam9, sorting the item removal flags out). Does anyone object to me uploading and publishing that? Confirming. So are you rolling this jam into 2.3 release soon? I am cutting a trailer for the whole pack that will be ready by QuakeCon. Would love to have a central all-in-one ling to send people to in the trailer and youtube comments - plz let me know.
|
| You must be logged in to post in this thread. |
| Website copyright © 2002-2024 John Fitzgibbons. All posts are copyright their respective authors. |